|
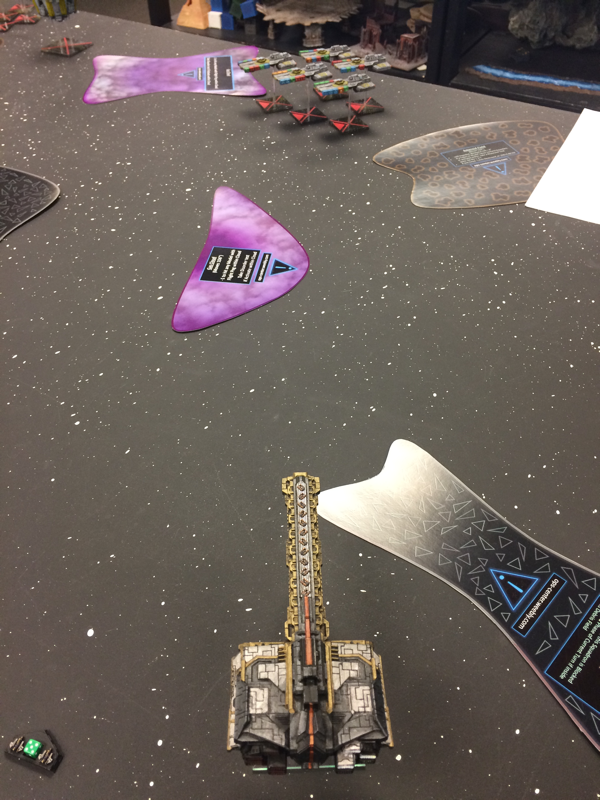
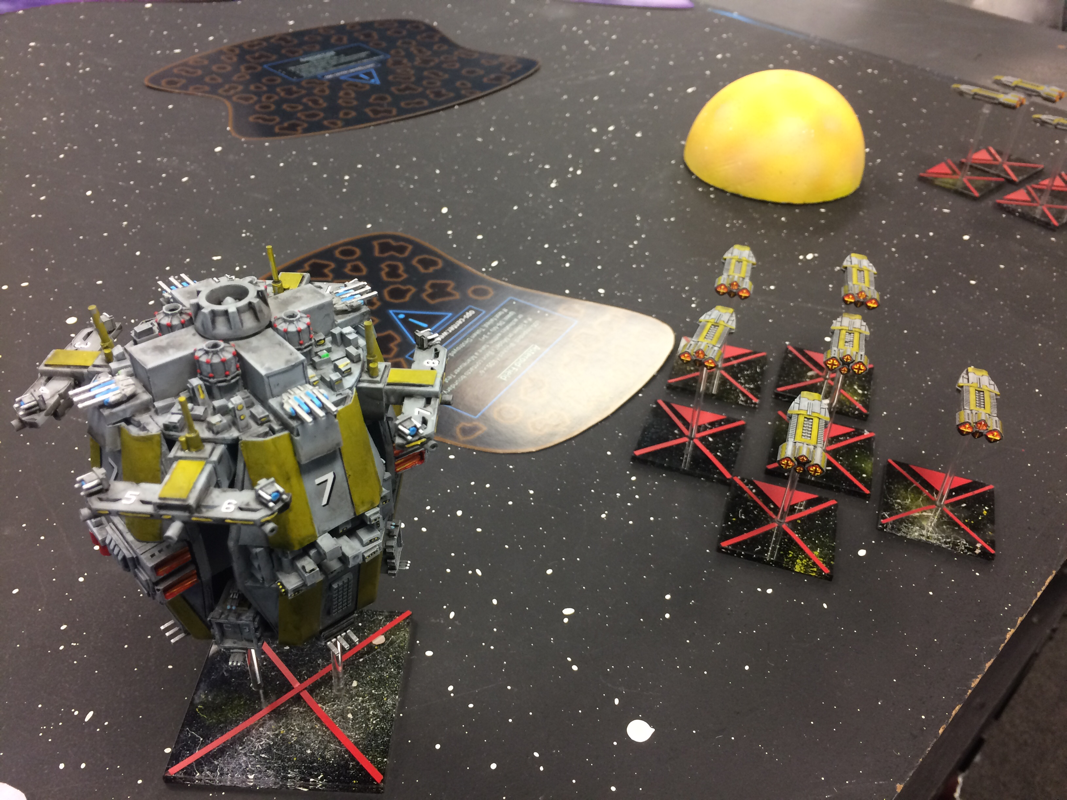
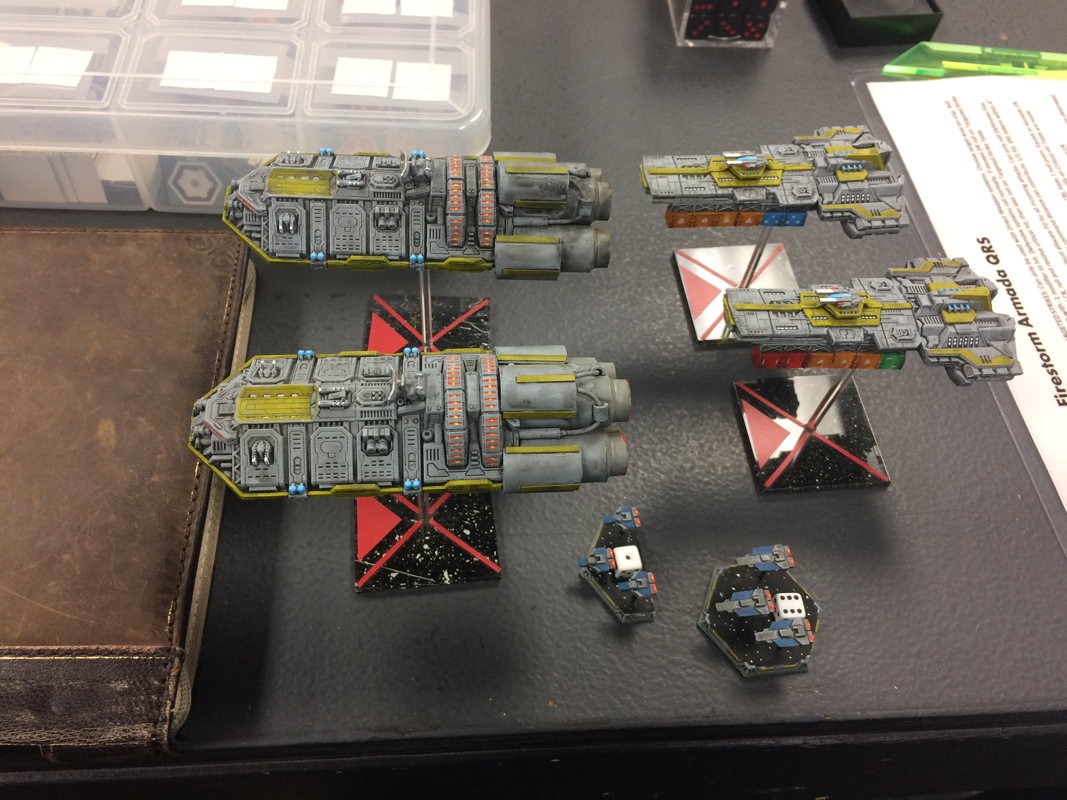
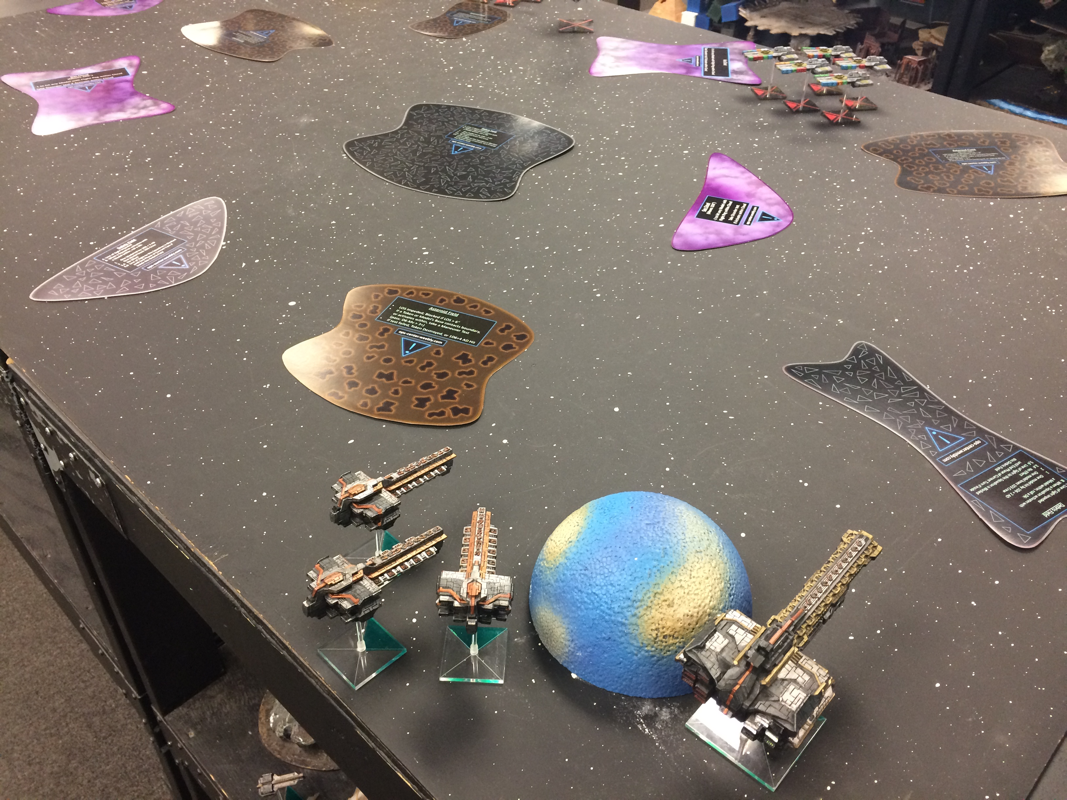
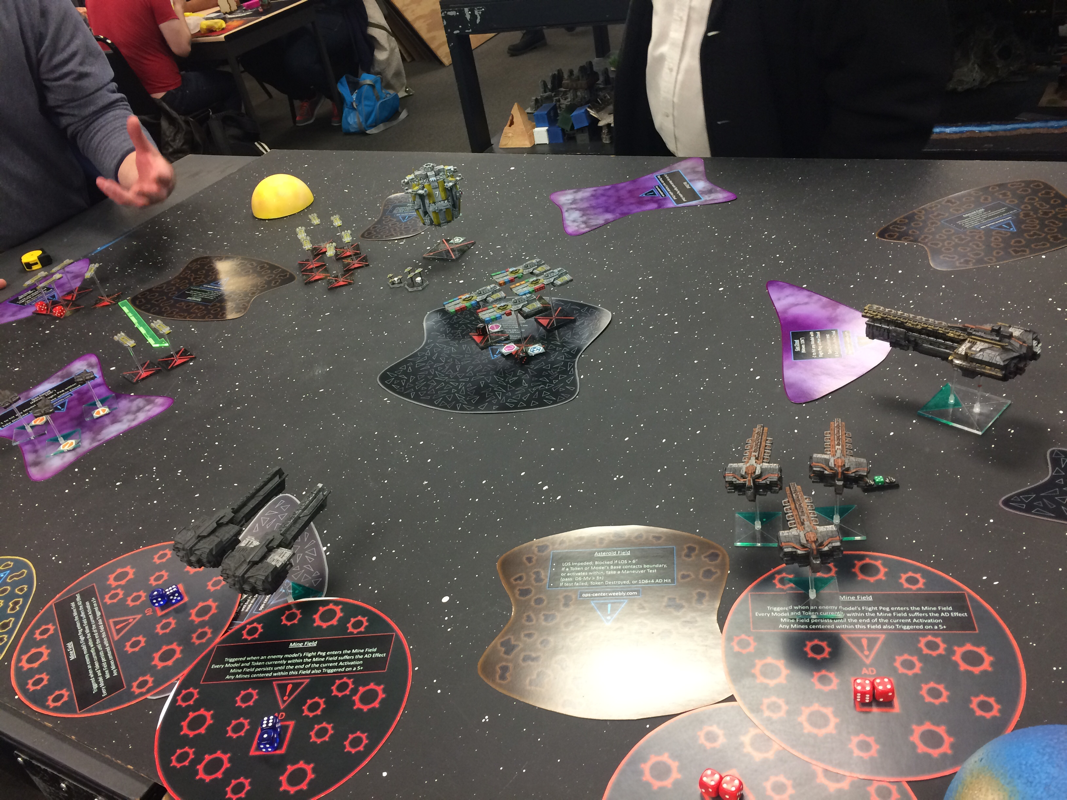
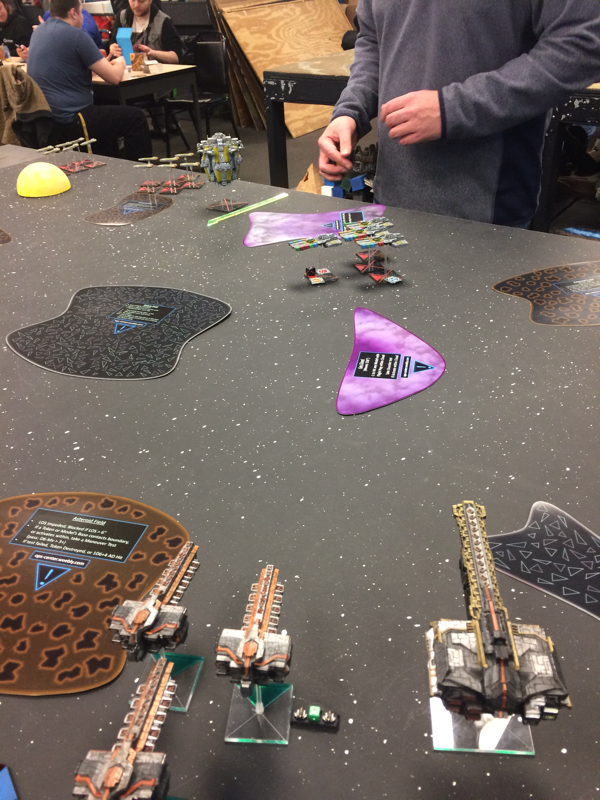
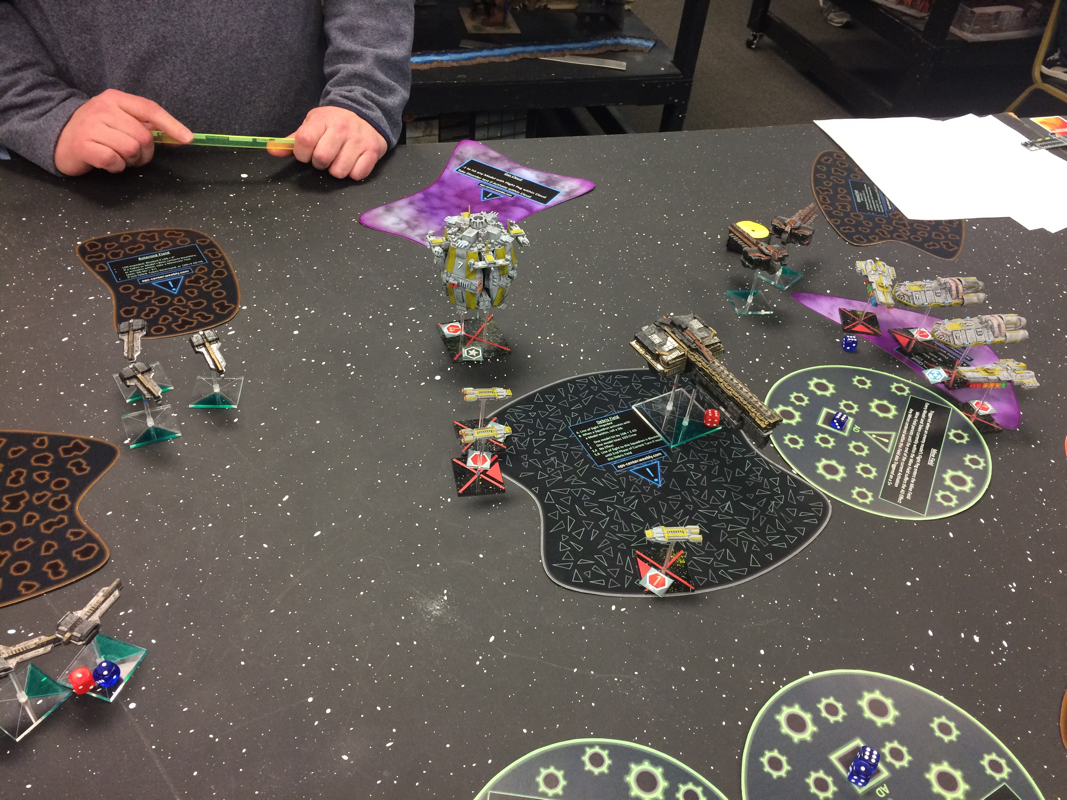
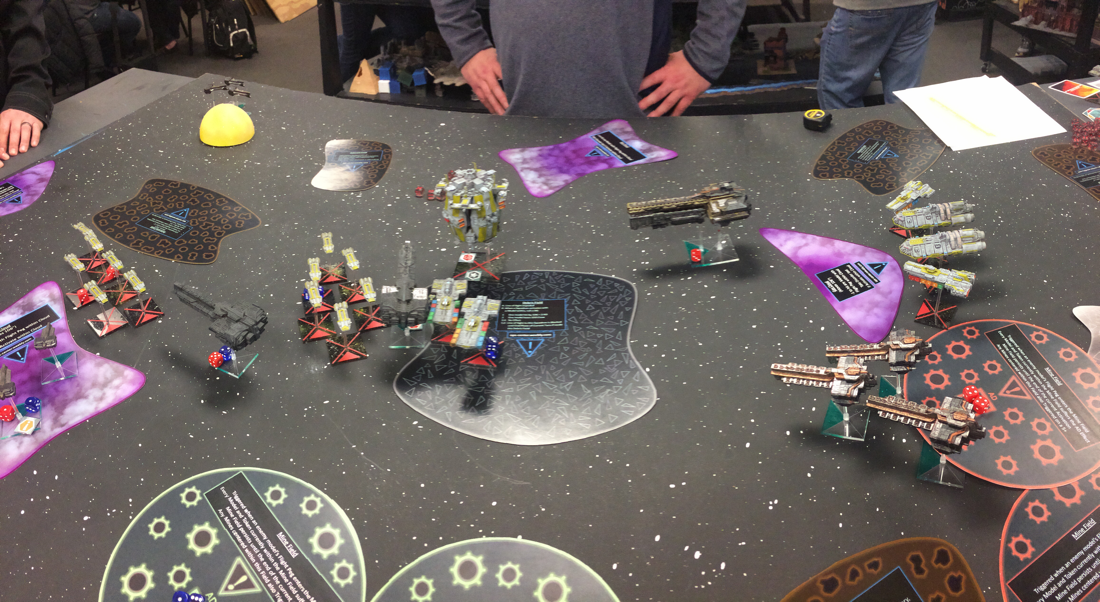
ast week, I had the opportunity to face Traders for the first time. Mad Mac scratch built an entire Trader Fleet, mostly by kit-bashing old Terran models. Most impressively, he scratch-built a Trader Reformer Class Battlestation, which looks exactly like the old renders for the Supermax Prison. We played a simple Border Clash, with terrain somewhat haphazardly placed on the table around a large central debris field... which would eventually become my bane. Mad Mac wanted to play a 1000 point fleet, so he could try every Trader unit. I used my normal Dindrenzi Core of a Praetorian, Heavy Cruisers, and two Frigate Squadrons. Because I'd be facing an unkillable Dreadnought... I mean a Battlestation, I also brought a Battlecruiser Squadron. Here are some photos after deployment. I placed the Battlecruisers and both Frigate squadrons in Reserve, Mad Mac placed his Carrier Squadron with Cruisers in Reserve. Turn 1&2I tried to take advantage of the Trader Cruiser Squadron placement, and destroyed 1 and almost destroyed a second one. Going into Turn 2, my Battlecruisers decided to show up... too early. What I should have done is brought them in with the rest of the fleet on my right side. Instead, I brought them in on the opposite side of the board, near the Battlestation and both Trader Frigate Squadrons. The Traders had initiative Turn 2, so I advised Mad Mac hide his Cruisers in the central Debris Field. With Torpedos as main weapons, and a LOT of CP for their class, Traders have very little risk for staying within a Debris Field. In addition, with large Squadron size and high PD, they are generally good at shooting down enemy Torps as well. Basically, all my Direct firepower was now useless. Turn 3-5The Trader Reserves arrived, and I was now in a very bad spot, with Carriers behind my Praetorian, and my Battlecruisers surrounded. Every Activation was tense, and I took a lot of damage this Turn while inflicting very little damage. Fortunately, my Battlecruisers barely survived Turn 3. Knowing they would not survive the game, I made the most of it and dropped two Mines. One enveloped the Cruiser Squadron hiding in the Debris, the other engulfed a Frigate Squadron. Also, I realized it was imperative to kill the Cruisers in the Carrier Squadron so my busted Praetorian could FSD Escape. Turn 4 saw the death of my Battlecruisers and a Heavy Cruiser (Carrier Bombers, Primaries, and Torps all inflicted Crits for a one Activation kill), while I killed 5-6 Frigates and 4 Cruisers. Game End AnalysisNot much else happened at the end of the game. The Battlestation was able to kill a Frigate, but not before I finally killed his last Frigate and Cruiser. My Heavy Cruiser and the Trader Carriers spiraled towards each other, ineffective. The final score was 2/5 to the Traders.
Unsurpisingly, the Dreadnought mislabeled as a Battlestation (ALWAYS Upgrade it to a 6" move) is a real beast. With 3 Shields, I was never able to get a Crit, and many large dice pools barely even inflicted a point of damage. While the 5 damage I inflicted didn't give me Battlelog, they did degrade its firepower from a max of 2x12 or 1x18 to a more survivable 2x7 or 1x10. The Carrier Squadron has an insane amount of offense, but it quickly degrades as Bombers take damage and it loses the Cruiser Accompanyments. The Cruiser Squadron didn't have a chance to do much, other than get shot... but with 4/6, maybe 1 Shield, and 3HP, they are very squishy. I suggest placing them in Reserve when possible, so they can have one turn with maximum firepower (2x9 or 1x15 plus 15AD Torps). The Frigates are annoying with high CP, PD, and Squadron size 6... but they're fairly limited with only Torps to 24". Granted, 14-17AD Torps is potent, but one Token can shut that down. If you can find a handy Debris Field to hide them in, they can be a serious problem for your opponent. As for the Battlecruisers... I need more practice with them. Generally, I need to discipline myself and only enter from the short board edge. With no PD and only Direct FF firepower, they are pretty limited, but potent.
2 Comments
As 2016 draws to a close, I wanted to share another small article on gaming. Strategy is an important part to any good wargame, but a lot of people don't really understand what Strategy actually is, or how to apply it. Hopefully you will learn both by the end of this article: StrategyStrategy is simply a plan. First and foremost, you need one Goal. Defining your goal is the most important part of the strategy, as it shapes everything else, so it's really important to define the best goal. The goal is simply a desired end state you wish to achieve; an achievement. Once you have one Goal, a focus, you can refine your plan with Objectives. Objectives tell you how to achieve your Goal. They are very specific, measurable, attainable, relevant, and timely: SMART. Goals are not Objectives, but people often conflate the two. Goals generally are not specific or timely; they may not even seem attainable. For example, a video game may have two Achievements: - Beat level 1 on Hard difficulty without dying - Kill 100 enemies with a specific weapon The first Achievement is a Goal, as it does not inform you in anyway on what to do or how to do it. Each player will probably develop their own way to achieve this goal. The second Achievement is an Objective. It is specific (use a certain weapon), it is measurable (kill 100 enemies), and it is attainable (every player should think they can do it). However, it isn't exactly timely, as there is no time limit; it is merely up to the player to determine when they wish to do it. It also isn't relevant to anything by itself, because it is not supporting a given goal; again, it is up to the player to create this Goal. If the player has the Goal to actively complete the Achievements in the game, then it becomes relevant. If the player doesn't have this goal, then this Achievement does not align with their goal, and they will not actively pursue it. In many FSA games, most players only have the goal to kill their opponent; this is pretty much the worst goal you could have, as it t does not help you with the second part of strategy: developing your game plan. Here is a broad Strategy for when the scenario only calls for you to kill your opponent: GoalMaximize game points while minimizing losses to obtain a winning condition Objectives 1. Destroy enemy units to gain points
2. Prevent opponent from gaining points by protecting units 3. Control game tempo by baiting/forcing your opponent to make certain moves Our Objectives are in priority order as well. The primary Objective is to kill units, because that is how you get points, which is what you need to win. The secondary Objective is to deny your opponent opportunities to gain points; this is how you keep from losing. It also gives you future opportunities to do damage and score points later. The last Objective is about Tempo. If you can't realistically cause damage with your next Activation, and you can't do anything to protect your fleet, what should you do? This is the answer. Books could be written about game tempo, so I'll give one example. If you ever find yourself predicting how your opponent will react to your Activation choice (Unit A or Unit B) you're thinking about Tempo. It's about defining your opponent's choices, and is a large but subtle part of gameplay. Generally, if you can dictate the flow of the game by acting instead of reacting, you should be in a better position to inflict damage while minimizing losses. With three prioritized Objectives supporting one Goal, we now have a good Strategy for playing Firestorm Armada. Everything else within the game, from Deployment to your final Activation is Tactics. List-building is technically Grand Strategy and Logistics, as it happens before you start playing the game. I’ll try to address both to some degree in the future. First, an apology. I know there isn't much Firestorm Armada content online, because I'm probably like you and constantly looking for it, so anything is better than nothing. I intended to post every Saturday, and that has not happened. Now, the excuse. Right after my last post, I went on a trip and didn't pack my laptop appropriately, which resulted in a cracked screen. This made it very difficult to access my backlog of conent, which I had just transferred from my phone. While I could have found a solution, such as transferring the data onto another computer in my home, that 5 minutes of work seemed like too much work. I finally fixed my screen ($109 seemed like a good rate), so here we are. Static Gun-lineI've had this Fleet concept banging around in my head for a while, and thought I would share it first. Occasional dance partner Ruckdog of the Man Battlestations Forum and Podcast, is going to Adepticon, and would really like to win a game with his Terrans. Two weeks ago he posted on his weekly blog his thoughts from a terrible player (his words). I provided some input on both the MBS FSA Forum, as well as the Spartan Games FSA Forum. Here's a completely different fleet concept for Terrans, and FSA in general:
800 Point Terran Fleet: Tier 1: 230 Battlestation (Beams, Nukes, Shield Projector, 3x Interceptors) Tier 2: 225 3x Destroyers (Nukes, Sectored Shielding) 225 3x Torpedo Cruisers (+1 Shield/Projector, Nuke/Spook Torps) Tier 3 120 4x Armsmen Frigates Basically, this entire fleet is effective without moving. The Battlestation and Destroyers have Maneuverable, everything else can lob Torps in Any Arc while at Full Stop. For this style of list, set-up is crucial. The Battlestation and Destroyers need good firing lanes, but don't necessarily want to be in the open. The rest should be deployed behind Impeding/Blocking Terrain and/or within the Battlestation's Interceptor/Shield bubble. Ideally, the Destroyers will be placed such that, if an enemy closes within 20" or Shunts behind them, the Frigates and/or Cruisers can reposition to use their Direct Weapons to defend them, if they aren't covering this area already. This reactionary move should be the only movement this Fleet needs to do. The Nukes are important for one reason; it encourages your opponent to do something about thesm. Don't expect to actually land damage with a Nuclear Explosion, but do expect it to subtly manipulate how your opponent plays. They might just send a unit where every Frigate, Cruiser, and Battlestation Direct Fire weapon can blast them directly, which is great, because you aren't really planning to use these weapons. Keep in mind this Fleet is playing the long game. The goal is to frustrate your opponent with how little damage they've inflicted after 3 Turns, while you've been plinking away with Torps. Sadly, even a single Interceptor Token can ruin this fleet's day; the best solution is for the Destroyers to get a lucky Crit and Nuke any Tokens your opponent has, but odds are you'll just have to settle for doing very little damage. Make sure your opponent is also doing very little damage, and play for a 6-9 turn draw. This fleet should only lose if a mistake is made during Deployment; it wins when your opponent makes a mistake. Wow, it has been a long time since I last posted here. I guess NOVA took a lot out of me; I’ve only played two games of FSA since then. Both were fantastic games; one of which included our Beginner’s Tournament Champion and his RSN. I should have taken some photos, because he’s doing a fantastic job for painting his first minis. The dark blue/black/silver paint scheme is very clean and striking on the tabletop.
On the plus side, I have a ton of content I wrote during all the NOVA prep, just sitting on the shelf, so it’s time I start releasing it. First up is an article on SRS mechanics, specifically how to improve them in 3.0. This is a pretty hot topic in several online forums; the largest discussion seems to be here on the Spartan Games Forums. Keep in mind I wrote this article months ago, so it doesn’t reflect these discussions, and I’ve purposely held some ideas back from the Forums for this article. Here’s a list of what I have waiting in the wings: Being a TO* Strategy* Frigate Baseline Stats Cruiser Baseline Stats Battleship Baseline Stats Targeted Strikes* Lessons Learned from 1 year of gameplay* The Impact of Shields (and PD) Speeding up Gameplay* Terran Gun-line* Jettison Cargo* Using Civilian Ships* Beams at RB1* * These are fairly short, and will likely be posted within the blog. The rest will likely be PDF Articles. So hopefully some of these topics excite you. If there’s something in particularly you want me to prioritize, please let me know in the comments or via e-mail. (I started these Fleet Guides due to this input) Finally, I have an article on Omnidyne which is about 90% completed. Actually, it is completed, but I need to include the new rules allowing a Light Cruiser Squadron to upgrade to a Gunship or Escort Carrier, and Cruisers to upgrade to an Escort Carrier. These three new options will take some time to noodle over before I can publish my third Fleet Strategy Guide. After that, I’ll probably tackle RSN for my buddy Greg over at Man Battlestations (the latest Podcast has a post-NOVA interview right at the beginning.) |
AuthorStarted playing Firestorm Armada December 2014 Archives
December 2016
Categories |


 RSS Feed
